
Conducting reproducible research with Docker (Part 2 of 3)
Published:
This post picks up right where part 1 of this tutorial left off. If you haven’t read that, I strongly recommend you start there.
In part 1 of this series you saw how to get started using Docker for reproducible research. Here, we’ll build a Docker image with our own custom R environment. This will allow us to work in a reproducible environment with all the packages and libraries we need at hand.
The Rocker Project
Carl Boettiger and Dirk Eddelbuettel at The Rocker Project have done the hard work of properly organizing R and RStudio server applications into a well-maintained and versioned docker image. They maintain docker containers that run R studio with sensible security options and some helpful base packages. Their website is also a good resource for help using these images. In part 1, we used their image to run RStudio server in Docker. Now, we’ll build off their work in this tutorial to make our own image with whatever packages we like.
Tutorial
In this tutorial we’ll …
- Create a repository on github for our docker image
- Create a dockerfile
- Setup github and dockerhub integration
- Practice testing and installing packages
- Build our dockerfile locally (for testing)
- Initiate an automated build
- Tag our dockerfile with a version so we can refer to it later
Along the way, I’ll assume you have some basic working knowledge of git/github and the use of the terminal (though I’ve added some footnotes to help). I’ll also assume you’re on a mac, though things shouldn’t be that different on Linux. I can’t really speak to Windows, but the overall process should be similar.
Step 1. Create a git repository on github
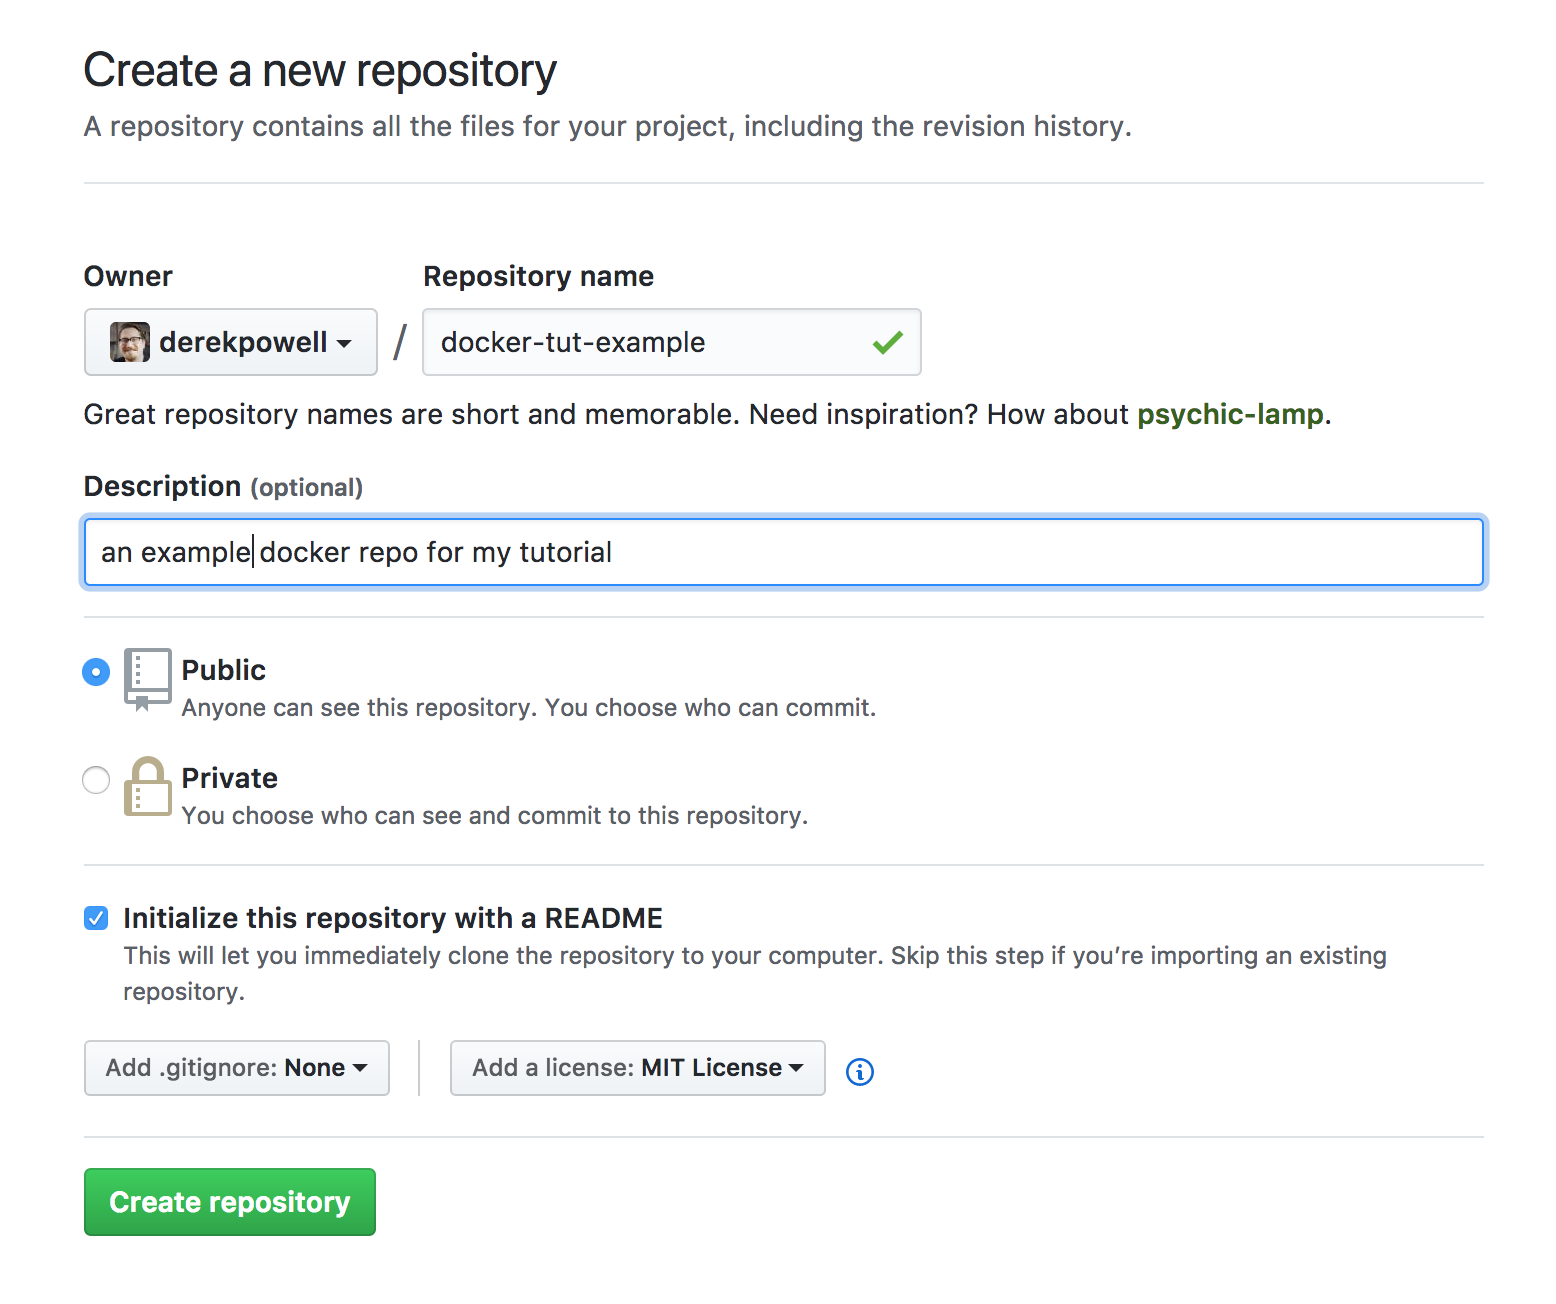
I like to create my repos on github and then clone them to my local machine so I can get the license and .gitignore files from github. I’ve made a repo in my github called “docker-tut-example” for this tutorial. You should name your repo whatever you like, but be sure to use your name in all the code below. Whatever name you use will also appear on Docker hub.
Step 2. Create a Dockerfile
In the root of your git repo directory, create a file called “Dockerfile” (no file extension). If you like, you can do this directly on github, or you can clone the repo to your local machine.1 In the editor of your choosing, add the following:
####### Dockerfile #######
FROM rocker/tidyverse:3.4.3
This will create a docker file image that starts from the rocker/tidyverse:3.4.3 image. We’ll use this to build up our own custom image.
Save the Dockerfile. If you’re working locally, add it to your git repository, commit, and push those changes up to github.2 Refresh your github page and you should see the Dockerfile has been added.
Step 3. Setting github and docker hub integration
Now we’ll set up integration between github and dockerhub for automated builds. This will allow other researchers to use your docker container and to allow you to use it across different machines.
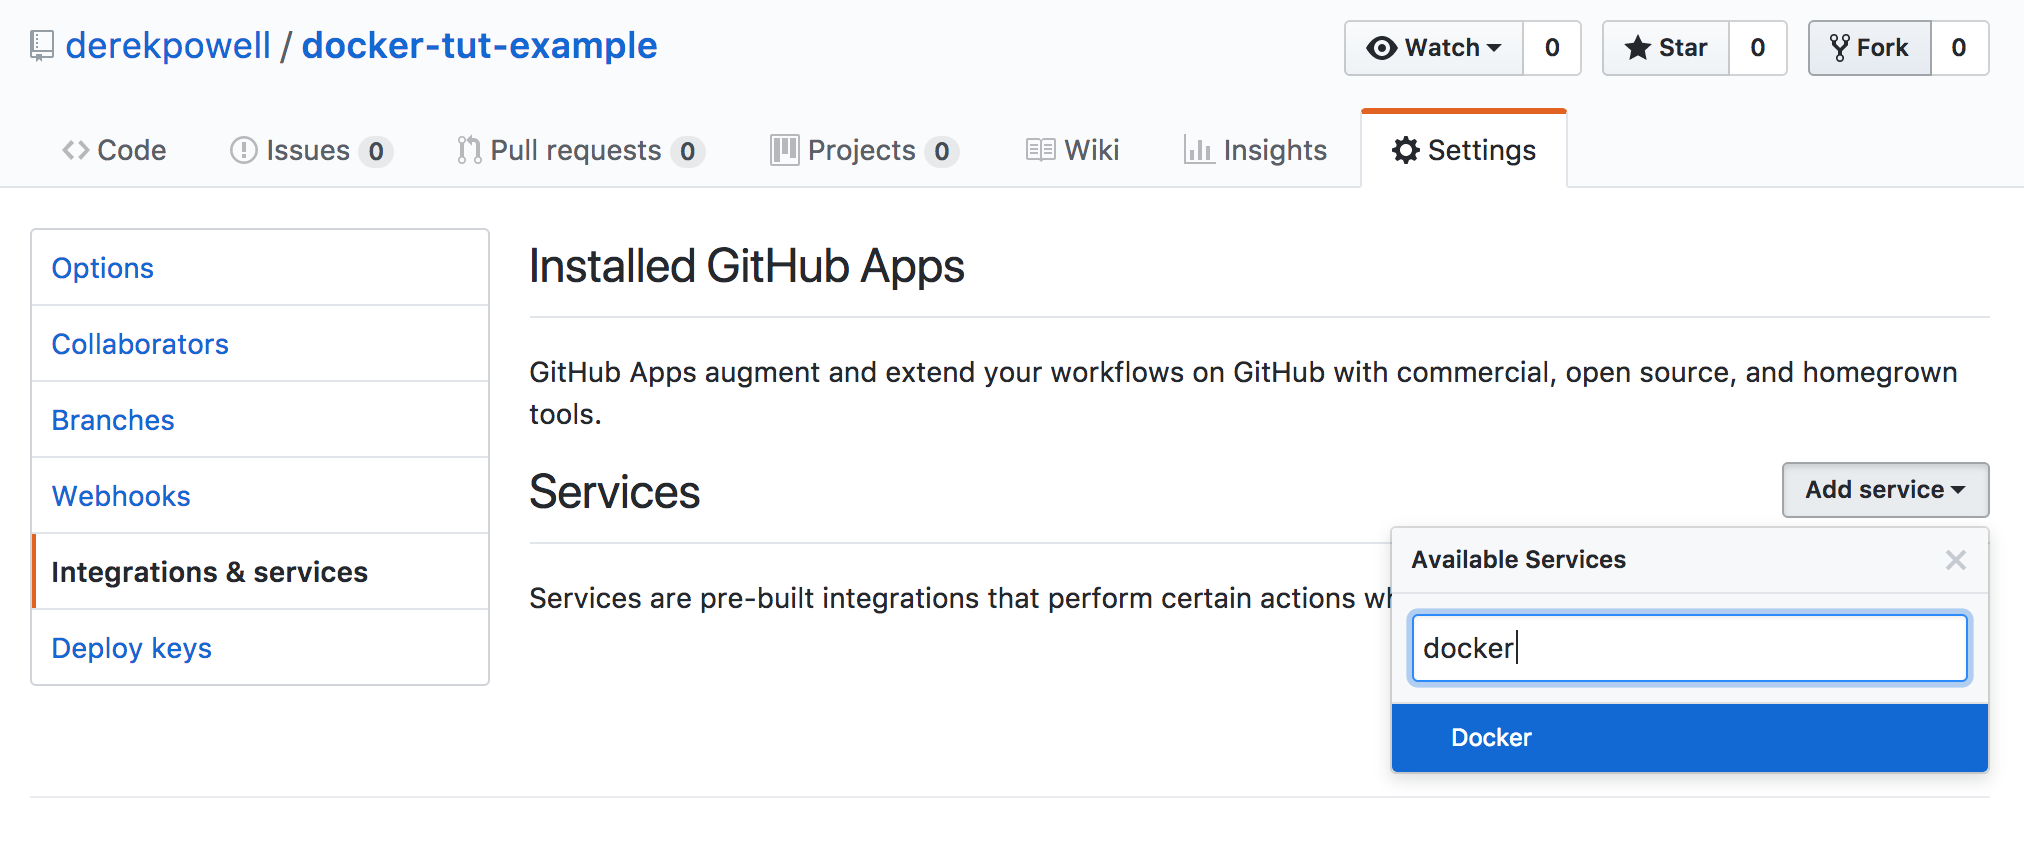
First, follow this guide to link your github and dockerhub accounts. Once your accounts are setup, head to the “settings” tab on your github repo page. Then, click on the “integrations & services” tab and add the docker service.
Finally, head over to dockerhub and click “Create” –> “Create Automated Build”, and choose to do so from your github. Choose the appropriate repo from the list.
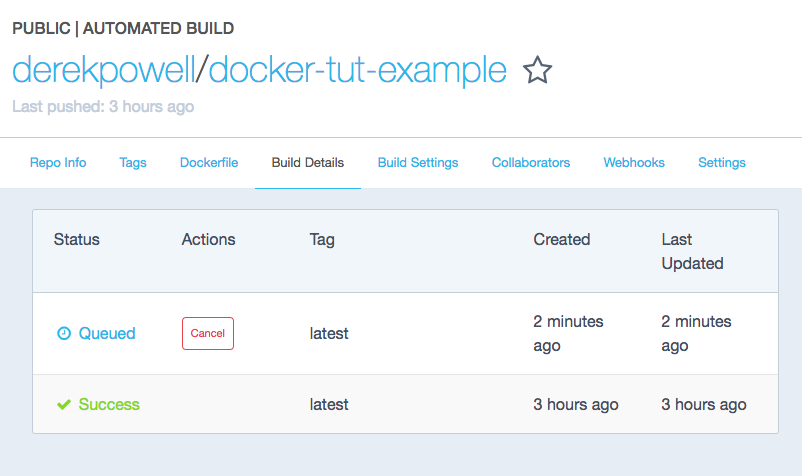
Now, whenever you push to this repo, an automated build will be triggered on dockerhub. You can watch the builds occur by checking “Build Details” on the dockerhub image page. If nothing is listed on the build details page, make a change in your README.md file so you can make a new commit and push it to github. This should trigger the build.
Step 4. Testing installing packages
The automated build will take a few minutes. Once it’s ready, download and run it on your own machine using the docker run command. In the terminal, enter (after replacing with your repo name):
docker run -d derekpowell/docker-tut-example
The container will download to your machine and start running in the background.
Entering running containers
To interact with running containers we need to find out what they’re named. To see a list of running containers, at terminal enter:
docker ps
Docker assigns each running image a container id and a weird randomized name. As I was putting together this tutorial it was xenodochial_kilby .

To get a bash prompt inside your running docker image, copy the name or container id and run the following command:
docker exec -i -t xenodochial_kilby /bin/bash
From here we can experiment with installing R packages and any other changes we might want to make. This allows us to test the install process without having to trigger a full automated build everytime we want to add a package.
Installing R packages from CRAN
Let’s try installing an R package using install2.r from littler (which is already in the container). Suppose we wanted to install the lme4 package (a popular package for hierarchical linear models). At your bash prompt, enter:
install2.r --error --deps TRUE lme4
This will install the lme4 R package and its dependencies, throwing an error if anything fails along the way. If it’s a success, we can safely add this line to our Dockerfile.
Installing R packages from github
Generally speaking, install2.r is the preferred way to install packages inside a docker container. But, suppose that instead of installing from CRAN, we wanted to install the latest development version from github. We can do that like so:
R --no-restore --no-save -e 'devtools::install_github("lme4/lme4",dependencies=TRUE)'
Installing R packages while specifying a specific version
Finally, let’s say instead of the latest version we actually wanted to install an older version or maybe we just want to be explicit about the version that’s installed. We can do that too:
R --no-restore --no-save -e 'devtools::install_version("lme4", version="1.1-14")'
To generalize, we can run any R command we want from the command line and we can do this in the creation of our docker container image.
Installing system packages
In some cases, installing an R package might not work as expected and you might end up with something like the following: Error: installation of package ‘rgl’ had non-zero exit status.
This is, in fact, the error you’ll get if you try to install the car package at this stage. This error occurs because we are missing some linux headers for libraries that are required. Unfortunately, littler’s install2.r script can’t take care of these dependencies. This is (a big part of) why we test!
Google this error and you’ll find this stackoverflow post is the first result. The solution is to install libglu1-mesa-dev before installing the car package. To do so, use the following commands:
apt-get update -qq
apt-get -y --no-install-recommends install libglu1-mesa-dev
Run those commands, then you can install car using install2.r (I’ll leave this as an exercise for the reader, as they say).
Step 5. Building Dockerfile locally
Now we’re ready to add the steps we just tested to our docker image. If you haven’t already, clone your github repo to your local machine.1 Then, open up the dockerfile and edit it so it looks like this:
####### Dockerfile #######
FROM rocker/tidyverse:3.4.3

ENV DEBIAN_FRONTEND noninteractive

RUN apt-get update -qq && apt-get -y --no-install-recommends install \
	libglu1-mesa-dev \
&& install2.r --error \
    --deps TRUE \
    lme4 \
    car
A few notes on what’s going on here:
RUNis a docker command that executes bash commands during the building of the image. In bash, you can chain commands together with&&and split them onto multiple lines with\. Everything must be done in noninteractive mode because the build is automated, you won’t be there to press “y” to continue.
At this stage, we could commit and push this up to github to trigger an automated buid, but before we do that let’s just make sure everything works by building it locally. From terminal on your local machine, 3 navigate up to the parent directory that contains your github repo with cd .., and enter the following command (swapping in your repo name):
docker build docker-tut-example
This will build the docker image from the dockerfile locally. Building locally can let you test more quickly, and without cluttering up your github repo with tons of commits. 4
Step 6. Push to github for automated build
Once the build succeeds, you can commit and push your repo to github and docker hub will begin automatically building your docker image. You can check on its progress in the “Build Details” tab of your docker hub repo.
Using the automated build feature of dockerhub might seem like a bit of extra work right now, but it is important for security and trust when you share the images. When you share a docker container that was produced with an automated build, your recipients can check the dockerfile and be sure of its contents.
Step 7. Add version tags
There are lots of different ways you might organize Docker containers to achieve a reproducible workflow. As far as I can see, the simplest would be to maintain a single “personal” image with the libraries you use most. To maintain reproducibility between different projects, you can version this image using tags. Tags let you have multiple version of the same image, as we saw when we used the tidyverse:3.4.3 image in Part 1.
Under this approach, each time you publish a paper or release some work, you would make sure that the docker container was tagged with a version and you would include that with your publication. Something like, “Analyses were conducted using derekpowell/docker-tut-example:0.0.1 docker image.”
To set up your dockerhub repo for tagging, head to the “Build Settings” tab on its page.
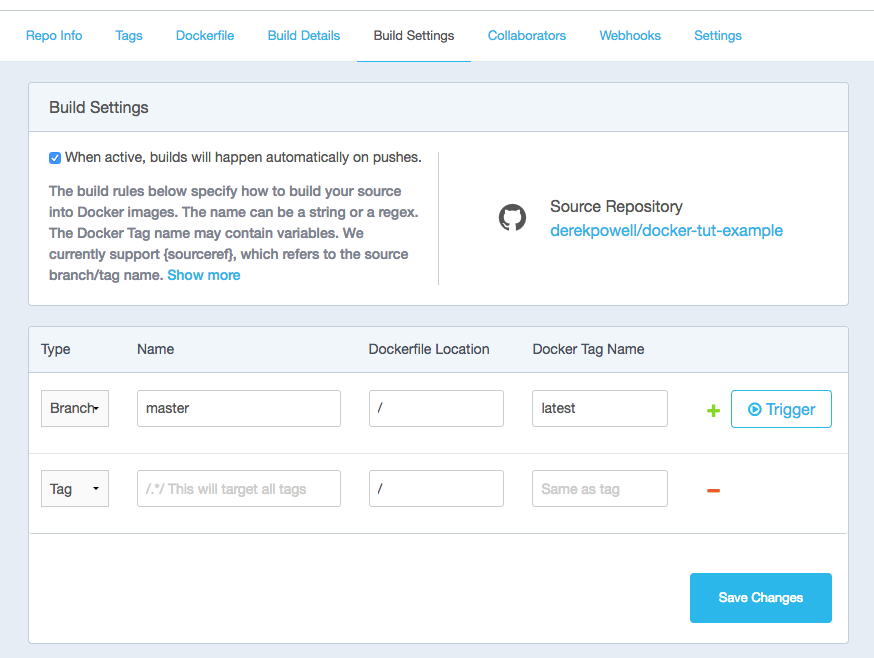
This is the tag configuration area. The first row shows that the “master” branch of the github repo is assigned the “latest” tag. This is a special, default tag. If you run docker build rocker/tidyverse with no specific tag, it will assume that the “latest” version should be used. On the next row, change “Branch” to “Tag” (as shown). Now, when you tag your github repo, that tag will also be reflected on docker. Be sure to click “save changes” when you’re done.
Now, head back to terminal and tag the current version of your repo:
git tag -a 0.0.1 -m "very first version"
This will tag the repo with “0.0.1”. If you don’t like that number scheme, you can use any other you like, or even more descriptive tags, e.g., “dissertation.” Do note, the normal git push command will not push tags. To push all tags, enter:
git push origin --tags
Then head over to dockerhub and check the “Build Details” tab–you should see the version being built. For more on git tags, check out this resource.
Conclusions
In this tutorial we created a simple docker container with a custom R environment. Using the steps covered here, you should be able to make create a docker container with R, Rstudio, and the packages you use most. This will give you a reproducible environment to conduct analyses and a way to share that environment with other researchers.
In Part 3 of this tutorial series, I plan to cover one of the side benefits of using Docker for reproducible research: the ability to run Docker containers remotely on cloud services like AWS and Digital Ocean. I’ll also cover some ways to reduce the (minor) pain points associated with running RStudio from within a container in day-to-day use.
Open terminal, navigate to the directory you’d like it to appear in, and type
git clone YOUR_REPO_NAME. ↩ ↩2Add it with ` git add Dockerfile
and make a new commit withgit commit -m “added dockerfile” .. Finally, push this to github withgit push`. ↩If your terminal window is still at the prompt in your docker container, you can type
exitto exit out (should be familiar if you’ve ever used ssh). ↩On a mac, you may need to make sure Docker has been granted sufficient ram. If not, you may get compiler errors. Access the docker app preferences via the menu bar and bump up the ram if this happens. ↩